With 2 simple ingredients you have in your kitchen you can quickly and easily make your own plastic milk! Kids are going to be super impressed with this fun, hands-on Milk Plastic project! With this very simple science experimentfor kids, you can turn milk into plastic! This milk and vinegar experiment is perfect for preschool, pre-k, kindergarten, first grade, 2nd grade, 3rd grade, 4th grade, 5th grade, and 6th graders too. Simply print pdf file with milk and vinegar experiment worksheet and you are ready to start this fun science experiment with milk!
Milk and vinegar experiment
Did you that before plastic was made from petroleum it was made from milk! In the early 1900s milk was used to make beads for jewlery and buttons. I love doing science experiments that impress kids! Not only are they eager to learn, but it stretches their little minds. Today’s easy science experiment is going to really impress your kids! They are going to change milk into plastic. The best part is this plastic milk is super simple to make and has such a great WOW effect for children of all ages. Try this turning milk into plastic with preschoolers, kindergartners, grade 1, grade 2, grade 3, grade 4, grdae 5, and grade 6 students. Whether you are a parent, teacher, or homeschooler – this vinegar and milk is a must try at home and in the classroom.
Milk and Vinegar experiment worksheet
Start by scrolling to the bottom of the post, under the terms of use, and click on the text link that says >> _____ <<. The plastic milk experiment worksheet pdf file will open in a new window for you to save the freebie and print the template.
Milk Plastic
All you need to try this simple milk activity are a few simple materials you already have in your kitchen:
- 1 cup milk
- 4 Tablespoons white distilled vinegar
- food coloring (optional)
- sprinkles or glitter (optional)
- sauce pan
- strainer
Milk science experiment
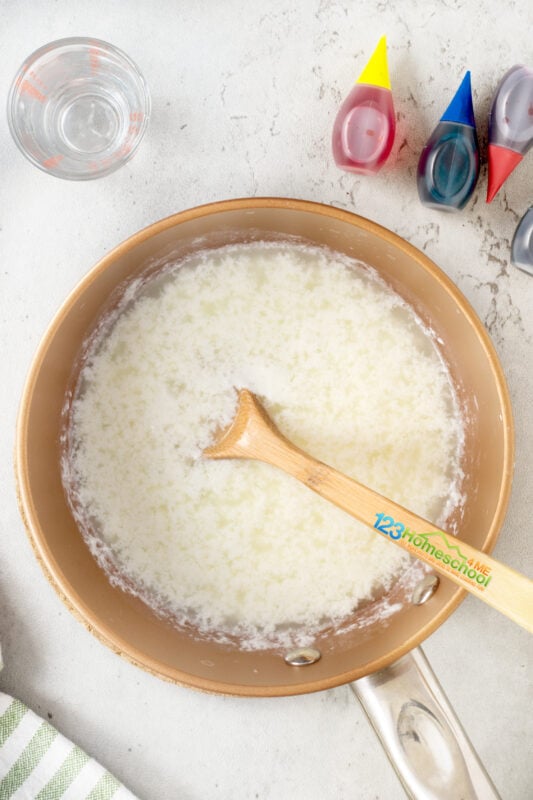
To start out with you are going to heat up 1 cup of milk to almost boiling in a saucepan or microwave it for 90 seconds.
Hint: I suggest using non-homogenized milk if possible for better clumping
Take the pan off the heat and add 4 Tablespoons white vinegar and stir for 1 minute. You will see the milk separate and clumps form.
Turn milk into plastic
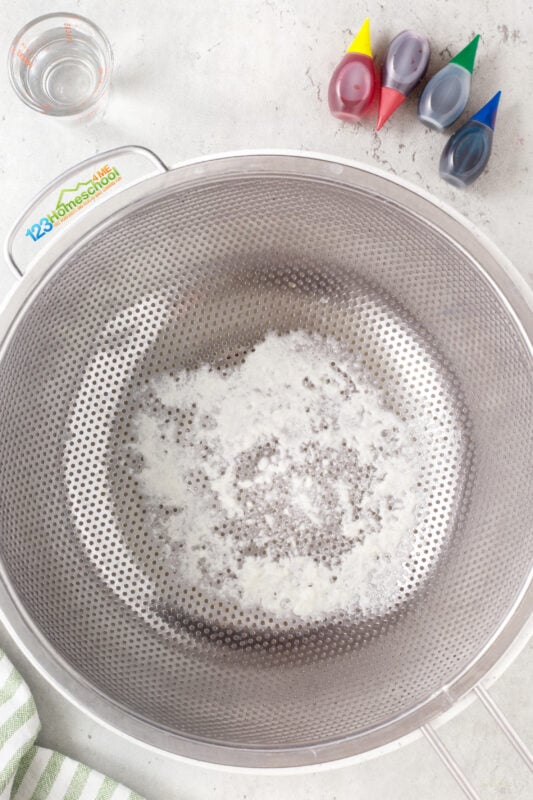
Now pour into a strainer to get rid of the extra liquid.
Science experiments with milk and vinegar
This is what you are left with. Once they are cool enought to touch you can rinse the milk chunks and then press them together. Now wrap them in a paper towel and sqeeze out any extra water.
You have two choices of WHEN to color your milk plastic. Put a drop or two of food coloring in several small bowls and pour the milk in them just after you’ve added the vinegar; stir. Or you can add it once you have rinsed the chunks and squeezed out the extra liquid; you can also add in glitter.
Plastic Milk
Spoon out your clumps from the strainer and pat dry with a paper towel. The more liquid you pat out the stronger plastic you will make.

plastic made of milk
The mixture can be formed into a ball and pressed flat. I suggest using a cookie small cookie cutter shape your mixture. Press down until it is smooth.
+plastic +made +of +milk
This time we decided to make pretty beads for a fun necklace craft.
milk experiment
Use toothpicks to make holes to make beads for necklaces.
Easy Science experiment
Place on paper towels to dry for at least 2 day.
Science experiments for Preschoolers
String beads onto yarn to make a pretty necklace craft.
Science experiments for Kids
The milk plastic is durable and such a fun DIY necklace craft for kids they can make with science!
Fun Science Activities
Another ideas is to turn this into more of an experiment by testing different fat percentages of milk such as fat-free and low-fat varieties. You could even test different ratios of vinegar to milk. How about trying a different acid such as lemon juice; would that turn the milk into plastic?
Vinegar and milk chemical reaction
Wondering about the science?
No, this milk and vinegar experiment does not produce real plastic. You made a substance called CASEIN which occurs when the protein in the milk meets the acid in the vinegar. As the casein in milk does not mix with the acid, the molecules move to join forces to make the casein plastic which forms a plastic-like blob that you can strain and mold.
When the plastic is dry, it is hard, shiny, and durable.
Food science experiments for kids
Use items commonly in your kitchen to try these food experiments for kids, but note they are NOT all edible!
- Plastic Milk Experiment with free worksheet
- Exploding Watermelon EPIC project to learn about potential energy
- Kids will be so impressed with this super cool Lemon Volcano
- Kool Aid Rock Candy science experiment you can EAT!
- Learn about the 5 sense for kids with lots of projects including an edible skin model
- This colorful oil and water experiment is super simple, but so FUN
- Volcano Watermelon Experiment – Summer Activity for Preschoolers
- Use jelly beans for this hands-on STEM Easter activity for kids
- Learn how to make frost in a can
- Discover the Archimedes bath tub concept using candy with this simple water displacement experiment
- Try the classic bouncy egg experiment with a twist
- Learn about types of rocks with edible rocks
- Learn about density with this Rainbow in a Jar
- Use chemistry to inflate these balloons with with Pop Rocks Experiment
- This silly dancing raisins experiment always makes kids giggle!
- Kids will love this jelly bean taste test experiment
- Use celery for a hands-on pollution experiment for kids
- This Egg Drop Project STEAM activity is all about protecting the egg
- Magic Milk 4th of July Science
- Make an edible Jello Cell Model
- Use eggs to try these air pressure experiments for kids
- You can’t eat them, but these magic melting snowballs experiment is loads of fun!
- Make your own Peep Experiment
- Try making butter science experiment for science you can EAT
- Whip up a fizzy lemonade science experiment for another fun science project you can taste
- You’ve got to try this pretty, colorful candy skittles experiments
- Or check out over 100 Food Science Experiments
Summer Fun
Looking for more outdoor activities for kids and things to do in the summer? Your toddler, preschool, pre k, kindergarten, and elementary age kids will love these fun ideas to keep them busy all summer long:
- 25 EPIC Water Balloon Games
- Marshmallow Shooters – go over 30 feet!
- 2 ingredient Easy Slime Recipe
- Strawberry Jello No Cook Playdoh Recipe
- Amazing Bubble Painting
- Fun-to-play-with Ocean Slime
- Free Printable Camping Scavenger Hunt
Summer Activities for Kids
- Vibrant Sidewalk Washable Spray Paint for Kids
- Egg Shell DIY Chia Pet Craft – Silly Spring / Summer Activities for Kids
- Grass Head Craft for Kids
- Blow GIANT bubbles with this Homemade Bubble Solution
- Pool Noodle Airplane Craft
- Outrageously FUN Bubble Painting
- Pasta Animal Crafts for Kids
- Bleeding Tissue Paper Fireworks Craft
- Beautiful Flower Suncatcher Craft
- Bubble Wrap Puffy Paint Ice Cream Craft
- Homemade Chalk Recipe
- 75+ FUN Scavenger Hunts for Kids
- Find activities by month with our June Crafts for kids or our June Activities for Kids!
- Try one of these fun Animal I Spy Printables
- Epic Squirt Gun Painting
- Create this gorgeous stained glass art for kids
- 107 Epic Summer Activities for Kids
- Outrageously FUN Balloon Drop Painting
Plastic milk experiment worksheet
By using resources from my site you agree to the following:
- This is for personal use only (teachers please see my TPT store)
- This may NOT be sold, hosted, reproduced, or stored on any other site (including blog, Facebook, Dropbox, etc.)
- All materials provided are copyright protected. Please see Terms of Use.
- Graphics Purchased and used with permission from Scrappin Doodles License #94836, Kim Cameron, Kathryn Estry, and free Kapiza font.
- I offer free printables to bless my readers AND to provide for my family. Your frequent visits to my blog & support purchasing through affiliates links and ads keep the lights on so to speak. Thanks you!
>> Plastic Milk Worksheet <<
Responses
-
While hardening does it need to stay in the cookie cutter or will it keep its shape outside the cutter until dry?
-
Leave it in the cookie cutter just a couple minutes and then it should keep its shapes on its own 😉
-
-
Does it stink sour milk?
-
Ours did not…. full disclosure, I did not let them keep it forever “just in case” =) But it was laying around our house for months….
-
-
Sounds interesting. I cannot wait to try this with me kids.


Leave a Reply