There are lots of cute pumpkin crafts for younger children, but less for older elementary age kids to have fun with a fall project. This super cute and fun-to-make Rubber Band Art Project is such a clever idea for October. Make this pumpkin art project easy enough for pre k, kindergarten, first grade, 2nd grade, 3rd grade, and 4th grade or more independent for 5th grade, 6th grade, 7th grade, 8th grade, and 9th grade students. You will love the cute pumpkin decoration that results from this pumpkin activity for kids!

Pumpkin Crafts
I love the month of October and November! Not only are they smack dab in the middle of fall with all the beautiful fall colors, fields filled with cheery orange pumpkins, cool weather, and lots of fun fall activities to do together as a family, but they always make a great spring board for cute pumpkin crafts too! Today, I wanted to make a pumpkin project that wasn’t too simple that my upper elementary age son would think was too babyish. This Rubber Band Art Project was a huge hit! He got to use tools, have fun creating something pretty, and I just love this decoration that reminds me of the fun we had making it together!
Rubber Band Art Project
This has got to be my favorite fall craft we’ve ever made. It is perfect for a child who is ready for a little more involved crafts than my preschoolers or toddler are. But it can easily be adapted to be a preschool craft too.

You can make this rubber band craft with a couple of simple supplies you just might have laying around the house – we did!
- wood – any leftover block of wood you have laying around will do. We used scrap wood from building our chicken coop which happened to be about 6-8″ x 4-5″ tall
- green spray paint (optional) – you can leave it a natural wood color, but we loved the added dimension painting the wood block produced. Plus we had pencil marks on our wood.
- black sharpie to trace the pumpkin
- 30 nails (with large head) – use whatever you have laying around!
- hammer (adult supervision is required)
- large pumpkin cookie cutter
- big handful of orange rubberbands
You will need a scrap piece of wood. If you don’t have a pile laying around like we do, pop over to Home Depot and ask. They cut would down there and often times have little scraps like this you can have for free. You only need it to be slightly bigger than your pumpkin cookie cutter – so probably 6-8” wide by 4-6” tall.

Rubber band Craft Ideas

Now trace your pumpkin cookie cutter using a sharpie onto your painted (and dried) scrap of food.
Hint: If you are worried about destroying your cookie cutter you can wrap it in foil or just pick up a new cookie cutter from Goodwill.

Next you will need to hammer nails into your wood along the outline of your pumpkin.
You will want them spaced about every 1” and make sure they are sticking up about 1”. Depending on the age of your kids, this is a great activity to introduce elementary age kids to working with tools. But if you have Toddler, Preschool, or Kindergarten age kids you will want to do the hammering yourself. Always make sure to use caution when working with tools.

Once you have nails around the perimeter of the pumpkin it is time to start using those little finger muscles to add rubber bands. Put the orange rubberbands from one nail to another in a variety of orientations and lengths.

Pumpkin Crafts for kids
Keep adding lots of rubberbands until you have a thick layer with lots of crisscrossing.

Finally add a small strip of felt to look like a stem. The contrast with the flat texture of the felt looks stunning next to the rubberbands. It was such a fun project to make for my 2nd grade son appealing to his growing skill level and interest in Daddy’s tools too! Plus it is one of the neatest looking projects I think we’ve done. It’s a keeper for sure.


Pumpkin Printables
- Free pumpkin activity printables that uses Pumpkin Candy to Count and Trace
- Practicing Counting with Pumpkin Seed Counting Activity
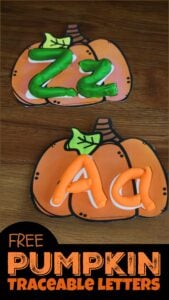
- Pumpkin Letter Tracing – use with a dry erase marker or playdough
- Super cute parts of a pumpkin craft to help kids learn the parts of a pumpkin
- Improve reading with this fun Word Family Pumpkin Activities for Kindergarten
- Fall Addition Sticker Worksheets are a fun, hands-on math worksheet
- Pumpkin Shape Matching Game to practice shape recognition with kids
- Practice sight words with this fun Pumpkin Sight Word Game
- These super cute Pumpkin Alphabet puzzles allow children to practice letter tracing as well as working on beginning sounds
- Lots of FUN October Activities for Kids
- Make practicing math fun with this super cute, Pumpkin Patch Math Game
- These fun pumpkin addition task cards are super cute and make practicing fun for kids
- Sneak in some fun practice with these homophone puzzles


- Grab this free Pumpkin Life Cycle Worksheet pack to learn about the life cycle of pumpkins
- Trace and Erase to practice again with this handy Pumpkin Letter Tracing printable
- Super cute pumpkin pie counting activity – pile on the “whip cream”
- Practice making shapes with these pumpkin shapes playdough mats
- Grab these Pumpkin Addition Worksheets for a no prep math activity for young learners
- This find the letter free pumpkin activity printables
- Adorable Pumpkin preschool pie craft for practicing counting!
- Pumpkin Pie Number Sense Activities for Preschoolers
- Hands on Pumpkin Shape Games for Preshoolers
- Work on One to One Correspondence Kindergarten with this pumpkin pie themed math activity
- Work on Number Bonds to 10 with these pumpkin themed math worksheets for kindergarten and grade 1
- Kids will love this Pumpkin Phonics activity where they will work on beginning sounds to put together these alphabet puzzles.
- Trace numbers and work on 1:1 correspondence with this free pumpkin activity printables
- Pumpkin Word Family Slides Printables